Create API Token
Author: goswitch
Updated: 2026-06-13T10:02:01.000Z After logging in, go to the console panel and select "Token Management" from the left side.
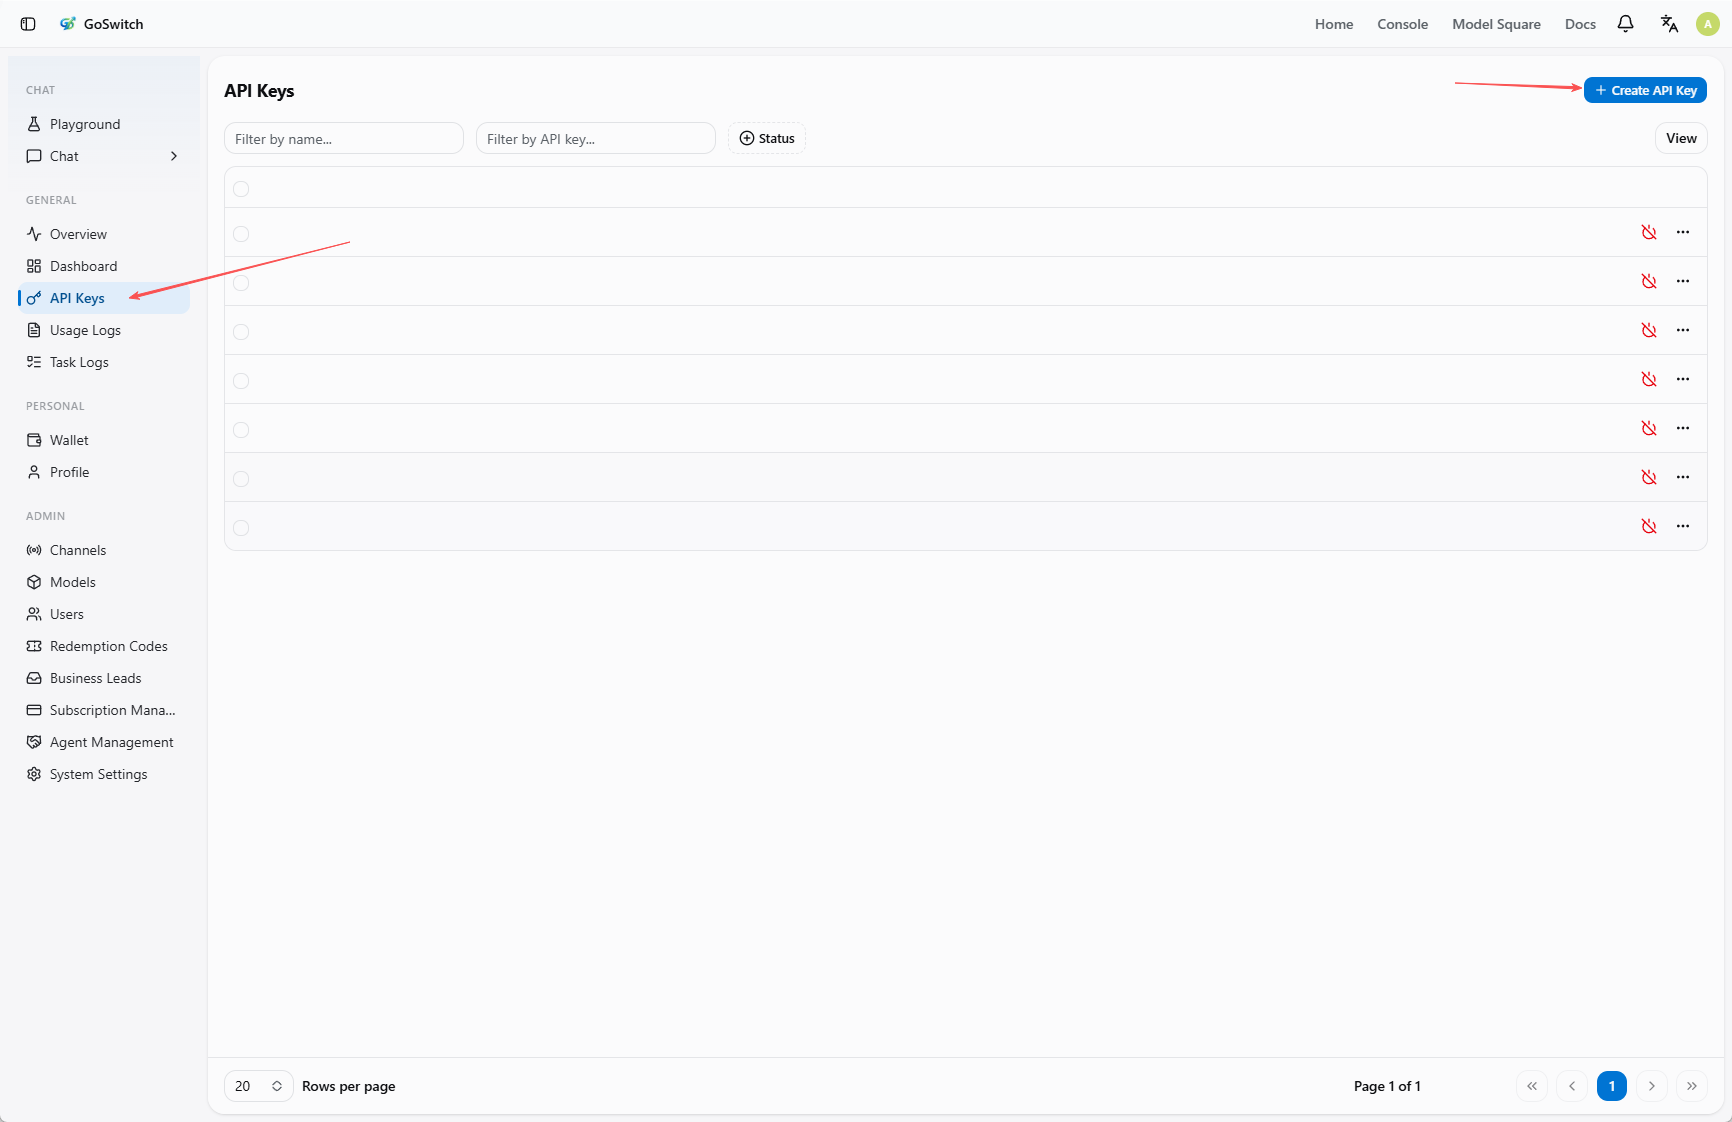
Enter Token Management
- Click "Token Management" in the left menu.
- Click "Add Token" at the top of the page.
Create a New Token
Fill in the token information in the popup:
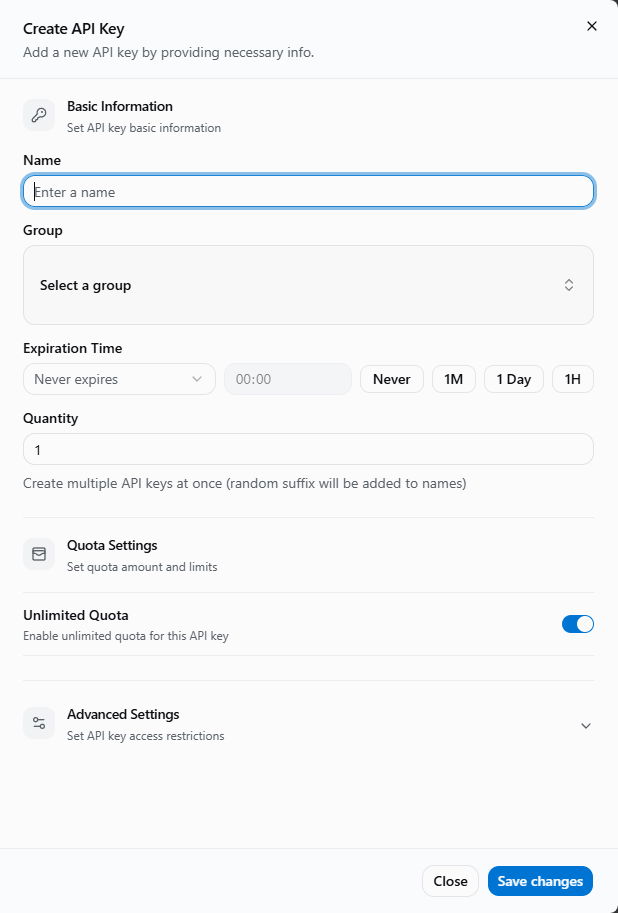
- Token Name: Used to distinguish different purposes, e.g.,
Claude Code,Codex,Gemini. - Token Group: Must be selected. The group determines which models this token can use.
- Expiration Time: Default is "Never expire", or you can set a validity period as needed.
- Quantity: Generally keep
1. - Quota Setting: When "Unlimited quota" is enabled, the token's actual available quota is still limited by your account balance.
- Access Restriction: If you're not familiar with this, it's recommended to keep the default settings. Don't enable model restrictions or IP whitelist.
Choose the correct token group
The token group directly affects available models. For example, Claude Code, Codex, and Gemini CLI need to select their corresponding groups. If you select the wrong group, you may encounter "model not found" errors or unable to call models during CLI configuration.
If you're unsure which group fits your scenario, please read the GoSwitch Group Introduction first.
After filling in, click "Submit" at the bottom right to complete the creation.
View Group Available Models
You can view the models supported by each token group in "Model Plaza".
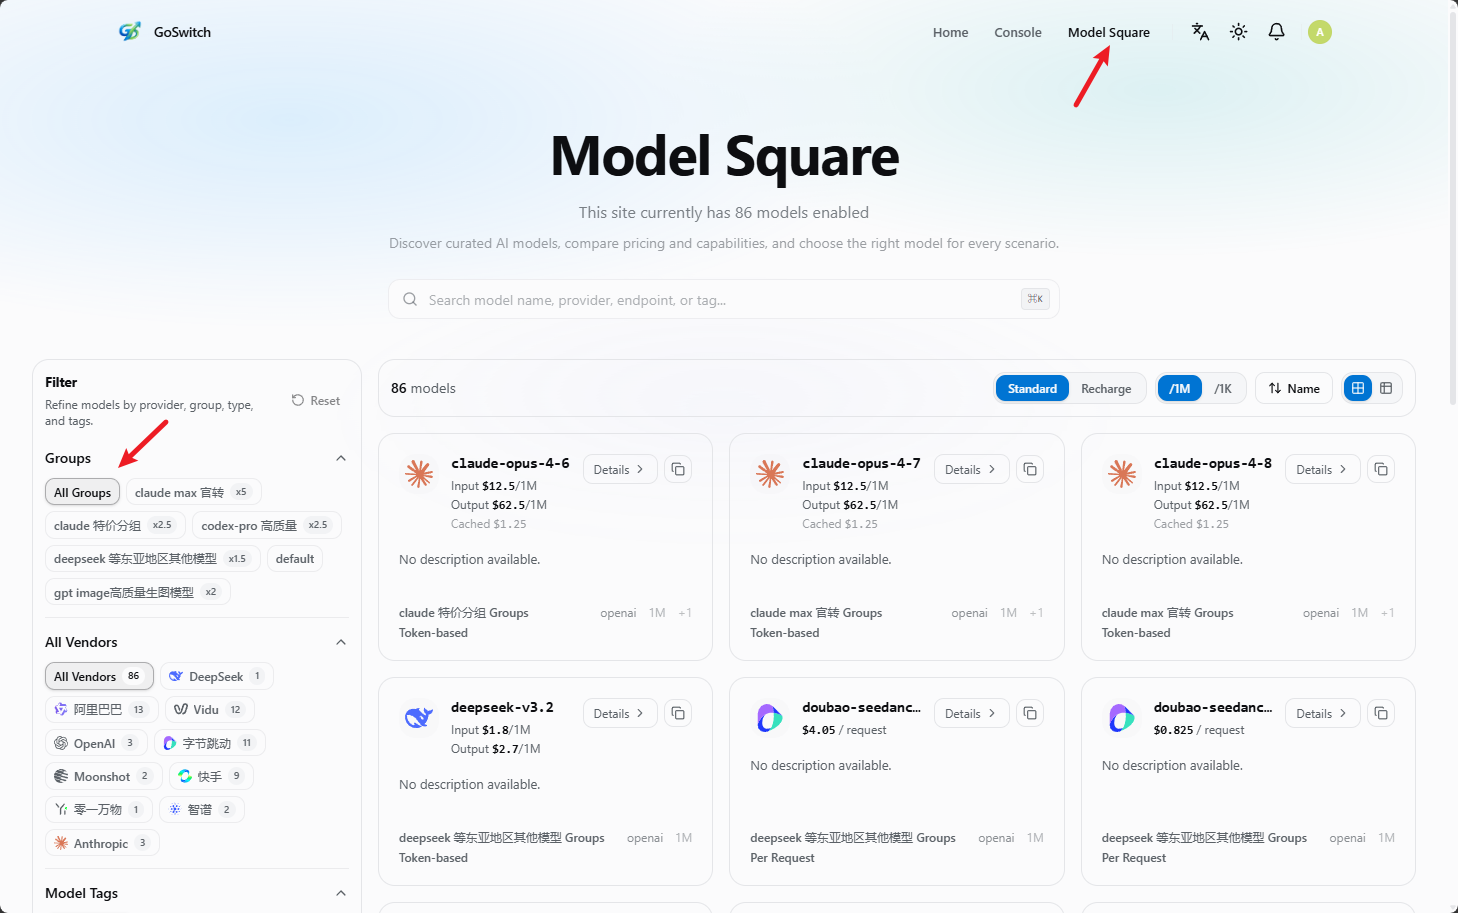
- Click "Model Plaza" in the upper right corner of the page.
- Select a group from "Available token groups" on the left.